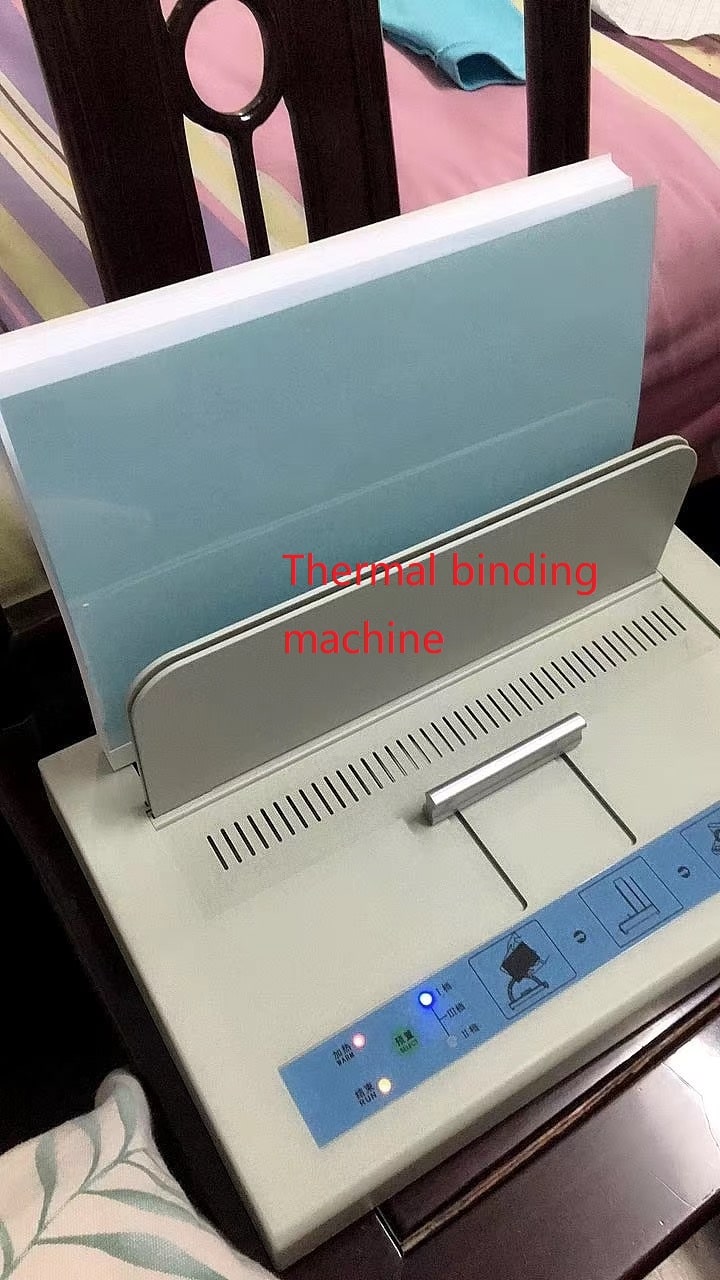
How can you make A4 paper into a book?
Hey there, wonderful readers! So glad to have you back on our blog.
For today’s post, let’s dive a little into a topic we might not pay much attention to usually – the slightly irksome issue of using staples for binding A4 papers. While staples have been a go-to method of binding for a while, they indeed have their share of issues. First up, we need to look at the durability factor. It’s a hard undeniable fact that over the lapse of time, staples have the propensity to rust. This not only harms your dear documents but also leaves your papers quite untidy-looking. We surely wouldn’t want our important papers to deteriorate, would we?


The problems don’t stop there, though. With staples, adding or removing pages from your document tends to be more troublesome than it needs to be. Moreover, let’s remember that staples might not exactly be selling the professional look we’re after in our presentation materials, right? So, all things considered, staples might be convenient but aren’t always the best choice every time. I hope these insights help you manage your records more effectively.
BOOKBINDING TOOLS & MATERIALS
Let’s switch gears a tiny bit. What if I told you that you could make your own book with a thermal binding machine? Ready to start off? Let’s make sure you’ve got:
– A thermal book binding machine
– Thermal book binding glue (ensure the size matches the thickness of your A4 papers)
– Thermal book binding covers (Cardboard paper, chipboard paper, leather paper, any size between 1/16in to 1/4in, depending on your book’s thickness, all will work)
– Book pages (A4, B5 paper, etc.)
To further assist, let’s go through a step-by-step guide on using a thermal binding machine. It’s pretty easy, enjoyable and the final product is certainly something to be proud of.
Book binding methods – Step by step Guide
Step 1: Assemble your materials. This includes a thermal binding machine, thermal book binding glue (keep in mind it should align with your A4 papers’ thickness), thermal book binding covers and your book pages, of course.


Step 2: Organize your book pages in the right sequence and ensure they are neatly arranged. This is key for a professional-looking end result.
Step 3: Set up your thermal binding machine. Of course, please refer to the manufacturer’s instructions!


Step 4: Apply the thermal book binding glue uniformly to the back of your book pages. Correct application guarantees a robust binding.
Step 5: Allow the glue some time to dry. This duration might vary depending on your particular thermal binding machine and the type of glue you’re using.
Step 6: Align your thermal book binding cover with the spine of your now-bound pages.
Step 7: Pop the book pages and cover into the thermal binding machine as per its directions.
Step 8: Patiently wait till the thermal binding machine indicates the end of the binding process.
And voila! With these simple steps, you’re looking at attractively bound books that are both long-lasting and deliver a professional vibe. Plus, you’ve picked up a cool new DIY skill! Happy bookbinding to you all!

The benefits of using thermal book binding machine
I. One of the foremost attractions of thermal book binding is its Professional Appearance. With its super neat and refined appearance, it adds a touch of professionalism to your documents.
II. The Durability and Longevity are striking features. The binding is secured and is resistant to the usual wear and tear, promising an extended life for your documents.
III. Talk about Versatility and thermal binding stands out. It’s compatible with various types of documents and varies in paper size accommodation.
IV. Another brownie point is its Time Efficiency. With a quick binding process and minimal setup time, thermal binding saves valuable time.
V. It’s exceptionally Cost-effective. This binding approach is not only an affordable solution but also reduces labor costs. VII. With thermal binding, you can explore a range of Customization Options. It allows for personalized covers and spines and opens up creative branding avenues.
VI. You will also be impressed by its Ease of Use. With minimal training, anyone can operate it comfortably. It offers Enhanced Document Protection, securely holding pages and minimizing the risk of any damage. XII. Also, it aids in creating a Streamlined Workflow, syncing perfectly with other office equipment to enhance document
Types of thermal binding machines
For personal DIY usage, Desktop thermal binding machine and Portable thermal binding machine are the best choices, not the Industrial thermal binding machine.
A. Desktop thermal binding machines

B. Industrial thermal binding machines (For personal DIY or general office usage, the industrial thermal binding machine may not be that necessary. )
C. Portable thermal binding machines

How much it costs to get the book binding machine and related gadgets ready?
The cost can be around $ 80 – $350, subject to the choice of binding machine products. To get started, you can even get everything ready within the budget of $100.
Safety Precautions of using book biding machine
A. Avoiding contact with hot surfaces
B. Using protective gear when necessary
C. Keeping children and pets away from the machine
D. Turning off the machine when not in use


Why do people keep pets, why domestic animals have become so popular.
what to consider when choosing a pet, popular pet breeds.how to ensure comfort and care for pets, how to ensure the health of your pet.fun facts about pets, why people adore pets.How to teach pets commands, how to teach a dog to fetch.
domestic animals and their homes [url=http://www.petstorepetsupply.com/]http://www.petstorepetsupply.com/[/url] .